When I tried Lara Bars many years ago I thought they were gross. That was before I did Jorge Cruise's Belly Fat Cure and learned to live with less sugar in my life. I totally credit his diet with teaching me that fruit really IS sweet and is also in the category of desserts as far as how much we should have. So, when I tried Lara Bars again recently as I began to explore the 100 Days of Real Food blog I thought they were FAN-tastic.
Then I thought, I bet I can make these myself. (Which is very Eric of me!) I started with this post which I found on Pinterest which has lots of great variations and recipes. However, following her instructions exactly left me with kind of a dry crumbly bar.
I decided to venture out on my own. After all, it's TWO ingredients. I could hardly mess it up too bad :D
Here is the way I did it. Eric declared that my Lara Bars were 'spot on'. It's so easy. I hope you will give it a try. The two ingredients you will need are pitted whole dates and cashews. (This is the basic bar, see the Pinterest post for ideas on how to change it up)
First put the cashews in the food processor and process until MOST of the nuts are very very fine and just a few are less than pea size. Kind of just before all of it is nut flour. I then emptied the nuts right back into the container and without washing the processor added the dates.
With the dates in the food processor (I dumped in the whole bag) process while gradually streaming in 1 to 2 Tablespoons of water. Process until the dates begin to clump up on the side and have a very thick brownie batter consistency.
I added all the dates I had processed into another bowl and gradually added the nuts, mixing with my fingers till I felt the dates had accepted the right amount of nuts. (I did NOT end up using all the nuts)
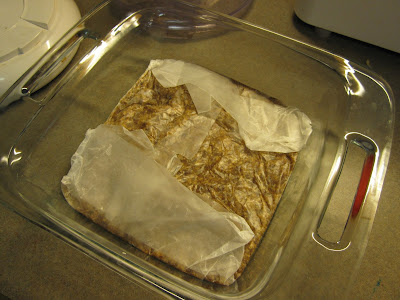
I lined a 9x9 pan with wax paper and pressed the mixture out flat and relatively smooth (these ARE homemade after all hehehehehe) then I popped them in the fridge.
I left them overnight to chill and then I unwrapped them and cut them up. I get 10 bars from this method. I'm thinking I ended up with at LEAST 4 extra bars for the same cost with this method (and I still have some nuts left for next time).
I was really pleased with the texture this time and I think that pulsing the nuts a bit more than last time and adding the water was the key to this.
To store the bars I just wrapped them back up in the same wax paper. Wrapping each bar semi-individually so the wouldn't stick together and put them in a smaller container for the fridge (I put the lid on after I took this pic). You could also store them in snack size ziplocks to pack in lunches.
Enjoy them. They are DE-licious and so so so easy!


No comments:
Post a Comment